How to Install WordPress: A Guide for Beginners (2024)
If you want to install WordPress to start your own website or blog, you’ve come to the right place.
I will explain step by step how to install WordPress on your own web space with your hosting provider.
The guide will be deliberately very detailed and will include plenty of screenshots so that beginners can easily follow along and do their own WordPress installation from there. Everything is covered, from ordering web hosting to uploading WordPress files, creating a database and setting up WordPress in the browser.
Overall, everyone should be able to get their WordPress installation up and running with these instructions. So let’s get started.
Requirements to be able to install WordPress
Before you install WordPress, you need to decide how you want to install WordPress. In this guide, I will show you how to install the software manually. You will need web hosting and a domain for the installation and you will also need an FTP program to transfer the files. I will go into these points in more detail below.
Different Types of WordPress Installation
Many hosting providers offer the option of a 1-click installation. This is a simplified, automated installation that can be carried out in just a few steps. This type of installation can be an option for non-technical people. However, I do not recommend it as it is less flexible.
The better option is a manual installation. This involves downloading the latest version of WordPress and transferring the files to your hosting provider’s web space using an FTP program. You carry out the individual steps for configuration and installation yourself. This also ensures that you ultimately have a clean installation.
A manual installation is not difficult and can be carried out by anyone without any problems. In this step-by-step guide, I will show you exactly how to do it.
Web Hosting and Domain
One of the prerequisites for installing WordPress is a hosting package or server and a domain. There are numerous web hosting providers, each of which has different hosting packages to choose from. You should compare the various offers and choose the one that suits you best.
A particularly good provider is WPX. It impresses with very fast loading times (a Google ranking factor), excellent service and much more. As a first-class provider, WPX is slightly more expensive than some other hosting providers, but it is well worth the price.
If you want to spend a little less on hosting at the beginning, you can also take a look at the offers from Webgo or All-Inkl. They have pretty good hosting offers in their price range.
Once you have decided on a hosting provider, order the hosting package you want from them. You will then receive a web space on which you can install WordPress.
With most hosting providers, you can get a domain with your hosting package. As far as the domain is concerned, all you have to do is think of a suitable domain name and check whether it is available. You can then order the domain in your hosting provider’s dashboard.
After ordering the domain, it may take a while before the domain can actually be accessed via the Internet. If it doesn’t work for you straight away, wait a while or try again the next day.
FTP Client to upload Files via FTP
To install WordPress, you need an FTP client such as FileZilla to upload the files to your web space. FileZilla is a free program that you can download from the FileZilla website. Download the FileZilla client there (not the FileZilla server). This is available for Windows, Mac and Linux.
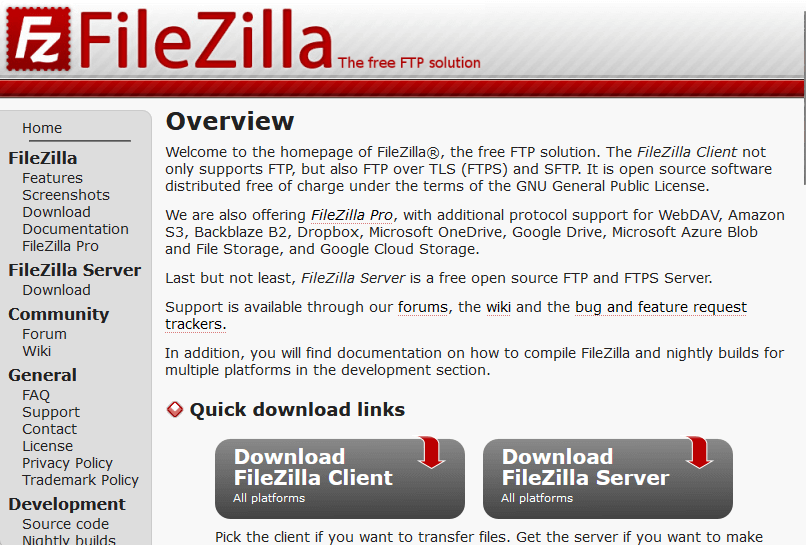
Once you have downloaded FileZilla, you can install the program on your computer. You will then need it to install WordPress.
Install WordPress manually in simple Steps (2024)
The following installation instructions were created using a hosting package from Strato. Strato is one of the most widely used hosting providers in Germany and so some people can certainly use the instructions 1 to 1. However, the procedure is also comparable for other providers. There will only be a few differences in the user interface in the dashboard of the respective provider.
Step 1: Set up SSL Certificate
SSL (Secure Sockets Layer) is a secure protocol with which the data exchanged between the browser and the server is transmitted in encrypted form. This protects the data from unauthorized access by third parties. In particular, sensitive user data, such as credit card and login data, and user behavior can be protected in this way.
If SSL is used, you can recognize this by the fact that the URL begins with https:// and by the lock symbol in front of the URL:

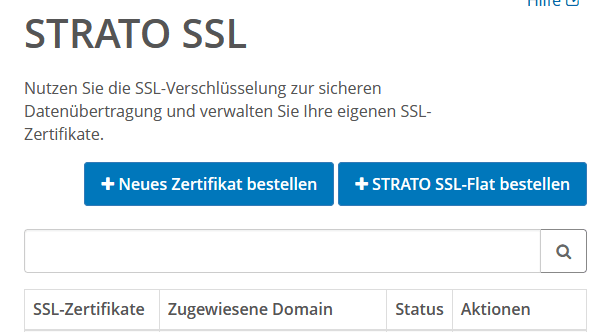
To use SSL, an SSL certificate must be installed for the respective domain. At Strato, you can order an SSL certificate in the customer area. To do this, go to your package after logging in and then select Strato SSL under Security. Then click on the “Order new certificate” button.
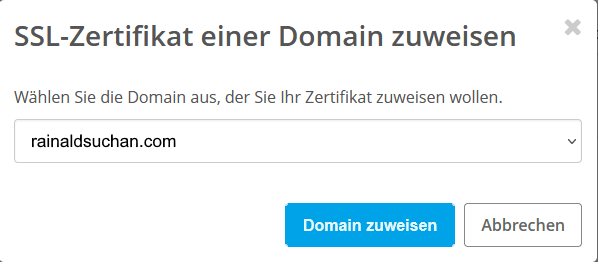
If the certificate has been issued, it will also be displayed in the overview. The certificate must now be assigned to the domain. To do this, go back to Strato SSL under Security. Next to your domain, click on the “Assign” link. A dialog box will then open in which you select the domain to which the certificate is to be assigned and click on the “Assign domain” button.
The assignment process can take a while. You can view the status of the assignment in the overview table. Your domain now has an SSL certificate and uses a secure, encrypted connection.
Step 2: Create a Database
The next step is to create a MySQL database. This new database is created in the Strato customer portal under the menu item Databases and web space – Database management.
There, click on the “Create database” button.

In the dialog box, you can select the type of database and must assign a password for the database. Finally, you can create the database for your WordPress installation using the “Create database” button.
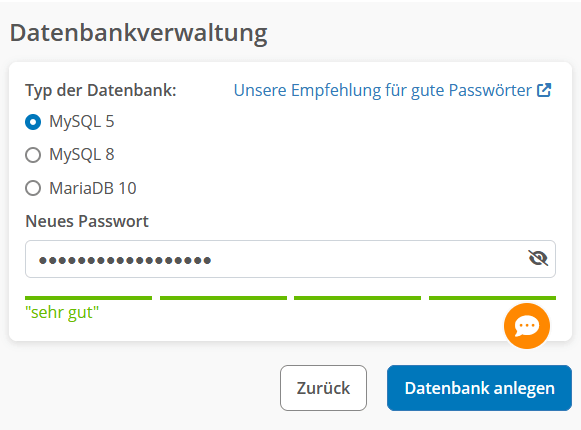
Tip: You should copy the database name, the user name and the password into a text file, as you will need these again in a later step.
Step 3: Download and unzip WordPress
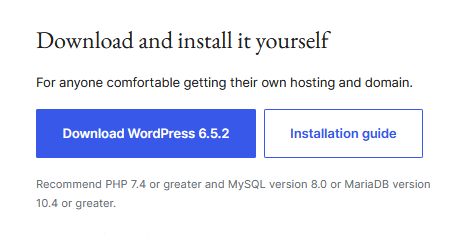
To install WordPress, you must first download it from the official WordPress website. You will receive a zip file with the download. Make sure you use the latest version of WordPress.
After downloading, unpack the zip file with a zip tool.
Step 4: Customize the Configuration File wp-config.php
The wp-config.php file is the central configuration file of WordPress, in which the connection data to the previously created database is entered.
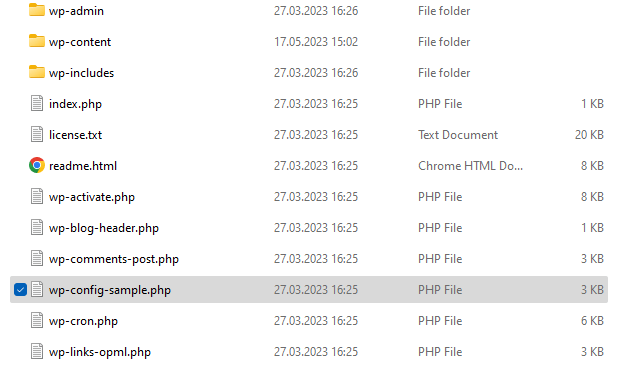
To make these configuration entries, search for the wp-config-sample.php file in the unpacked WordPress directory. Rename this file to wp-config.php and then open it in a text editor, such as Notepad++.
Note: Do not edit the file with word processing programs such as Microsoft Word, Libre Office, Open Office or Google Docs. The formatting used by these programs can make the configuration file unreadable for WordPress.
You must now enter a few values in the wp-config.php file. The first is DB_NAME:
define(‘DB_NAME’, ‘database_name_here’);
Enter the name of the previously created database here instead of database_name_here.
define(‘DB_USER’, ‘username_here’);
Replace the entry username_here with the user name for the database.
define( ‘DB_PASSWORD’, ‘password_here’ );
Enter the database password instead of password_here.
define( ‘DB_HOST’, ‘localhost’ );
Instead of localhost, enter the Strato database server rdbms.strato.de:
define( ‘DB_HOST’, ‘rdbms.strato.de’ );
A little further down are a few lines of code in which you now need to enter authentication codes. There is a WordPress generator that creates these codes. Simply copy the generated code lines and replace the ones from the file with them.
define(‘AUTH_KEY’, ‘put your unique frase here’);
define(‘SECURE_AUTH_KEY’, ‘put your unique frase here’);
define(‘LOGGED_IN_KEY’, ‘put your unique frase here’);
define(‘NONCE_KEY’, ‘put your unique frase here’);
define(‘AUTH_SALT’, ‘put your unique frase here’);
define(‘SECURE_AUTH_SALT’, ‘put your unique frase here’);
define(‘LOGGED_IN_SALT’, ‘put your unique frase here’);
define(‘NONCE_SALT’, ‘put your unique frase here’);
The table prefix is defined in the section below. You should change this for security reasons.
$table_prefix = ‘wp_’;
To do this, replace the letters wp with a sequence of letters of your choice. The underscore at the end must remain.
Step 5: Upload WordPress Files to the Server
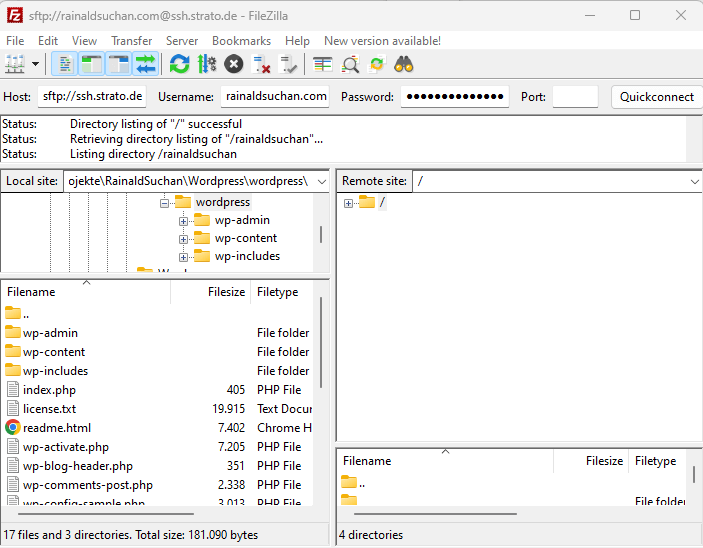
The next step is to upload the WordPress files to the web server. To do this, use the FTP program FileZilla that you installed at the beginning. When you open the program, you can enter the access data in the top bar:
Server: ssh.strato.de
Username: YourDomain.com
Password: Your Masterpassword
Port: 22
Enter your domain as the user name. The master password is a special password, e.g. for FTP access, which you can create yourself in the menu under ‘Security – Set passwords’.

Once you have entered the values, click on the “Connect” button.
You can now see the local files in FileZilla on the left-hand side and the directory on the server on the right-hand side. You can now select all WordPress files on the left-hand side and drag & drop them into the folder on the right-hand side. The files are then transferred to the server.
Note: When copying the files, make sure that you do not copy the wordpress directory, but only the files it contains, including the wp-admin, wp-content and wp-includes subdirectories.
It will then take quite a while for FileZilla to transfer all the files to the server. When the process is complete, you can proceed to the last step.
Step 6: Install WordPress and set it up manually in the Browser
Now you can set up WordPress in the browser. To do this, first call up the URL of your website in the browser, e.g:
https://YourDomain.com
A WordPress setup wizard will then open in the browser.
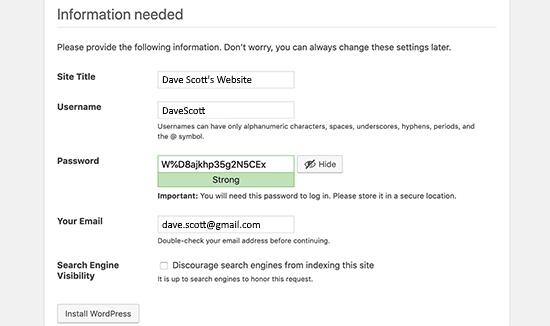
Enter the title of the website and a user name. This user is for the WordPress administrator account. Choose a user name that is not easy to guess, as this would otherwise compromise security. So simply ‘Admin’ or ‘admin’ are not suitable names.
You should also make sure that your password is as secure as possible. You can also use the password suggested by WordPress. The password should be at least 8 characters long and contain upper case letters, lower case letters, numbers and special characters.
Enter the e-mail address of the admin account under E-mail address.
You can leave the ‘Visibility for search engines’ setting as it is, i.e. do not check the checkbox. If you select this option, your website will not be indexed by search engines for the time being and therefore cannot be found via search. You can change this setting later in the WordPress backend.
If you now click on the “Install WordPress” button, a message should appear stating that the installation was successful:
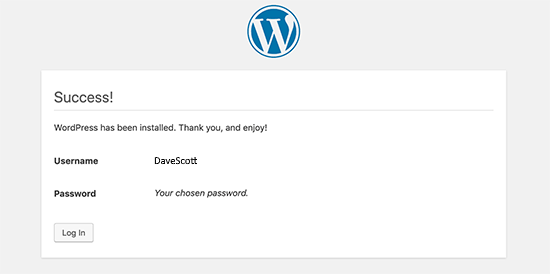
After successful installation, you can log in to the WordPress backend. To do this, simply enter the following URL in your browser:
https://yourdomain.com/wp-admin
Of course, use your real domain instead of ‘yourdomain’.
FAQ
How long does a WordPress Installation take?
Even though WordPress itself states that it only takes 5 minutes to install WordPress on the server, most people need a good deal longer. If you want to install and set up WordPress for the first time, you should allow 1 to 1.5 hours for this.
What are the minimum Requirements for Installing WordPress?
WordPress recommends the following technical requirements for installation:
- PHP version 7.4 or higher
- MySQL version 8 or higher or MariaDB version 10.4 or higher
- HTTPS support
- Apache web server (with the mod_rewrite module) or Nginx web server
Can I get support for WordPress?
There are various forums and groups on the Internet where you can ask questions about WordPress and get answers from others. The most common is:
Is it possible to install WordPress in another language?
Yes, WordPress is available in many different languages. These include English, German, French, Spanish, Portuguese, Japanese, Korean and Chinese.
Is it possible to change the language of the WordPress installation afterwards?
Yes, you can change the language at any time. You can do this in the WordPress settings under Settings – General – Site Language. Simply select the desired language here, e.g. English, French or Spanish. There are over 100 languages to choose from in total.